
Injection molding: The brief introduction and engineering guide
Ready to start injection moulding?
A brief history of Injection molding
 Plastics replace ivory
In 1869, John Wesley Hyatt invented celluloid, the first practical artificial plastic intended to replace ivory for the production of... billiard balls! Early Injection molding machines used a barrel to heat up the plastic and a plunger to inject it to the mold.
 The revolutionary invention
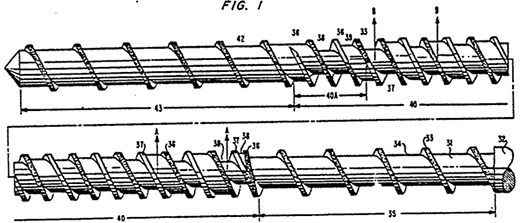
In the mid-1950s, the invention of the reciprocating screw single-handedly revolutionized the plastics industry. The reciprocating screw solved key issues with uneven heating of the plastic that previous systems faced, and opened up new horizons for the mass production of plastic parts.
 Injection molding today
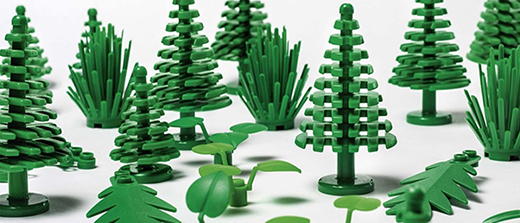
Today, injection molding is a $300 billion market. 5+ million metric tons of plastic parts are produced with injection molding globally each year. Recently, the demand of biodegradable materials is increasing for environmental reasons.
What is Injection molding?
Injection molding is a formative manufacturing technology: to create a part, plastic is first melted and then injected into the cavity of a mold. When the material cools, it solidifies and takes the geometry (form) of the mold. The part is then ejected and the process starts over.This is a fundamentally different way of manufacturing compared to additive (3D printing) or subtractive (CNC machining) technologies. The flow and solidification of the material during injection have a significant impact on the key design restrictions for this technology - more on this in below.
Compared to other technologies though, the start-up costs of Injection molding are relatively high, mainly due to the need for custom tooling. A mold can costs anywhere between $3,000 and $100,000+, depending on its complexity, material (aluminum or steel) and accuracy (prototype, pilot-run or full-scale production mold).
All thermoplastic materials can be Injection molded. Some types of silicone and other thermoset resins are also compatible with the injection molding process. The most commonly used materials in Injection molding are:
Polypropylene (PP): ~38% of global production
ABS: ~27% of global production
Polyethylene (PE): ~15% of global production
Polystyrene (PS): ~8% of global production
Even if we take into account all other possible manufacturing technologies, Injection molding with these four materials alone accounts for more than 40% of all plastic parts produced globally every year!
Injection molding machines: How do they work?
An injection molding machine consists of three main parts: the injection unit, the mold - the heart of the whole process - and the clamping/ejector unit.In this section, we examine the purpose of each of these systems and how their basic operation mechanics affect the end-result of the Injection molding process.

The Injection unit
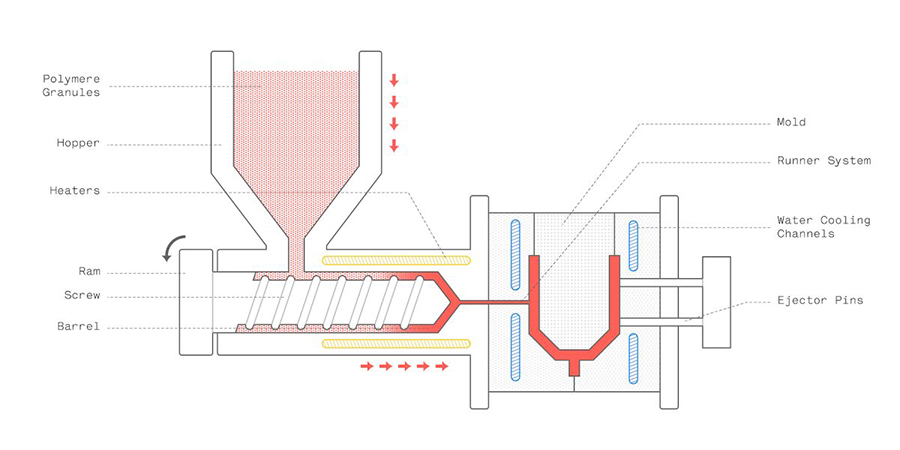
The raw plastic material comes as pellets. In the hopper, the pellets can be mixed with pigment or other additives (for example, glass fibers). This way, the color and physical properties of the molded parts can be tailored to meet the specific needs of each application.
Next, the material is fed into the barrel, which contains the reciprocating screw.
The screw performs two tasks: it carries the pellets towards the mold and at the same time it compresses them. In fact, the shear forces caused by the movement of the screw produces 60% to 90% of the heat needed to melt the plastic pellets. The rest is provided by the heater bands that are wrapped around the barrel.
Once enough melted plastic is in front of the screw, the ram plunges forward and injects the material into the empty cavity of the mold (like a syringe). This whole process happens in continous fashion, so filling the mold only takes a few seconds.
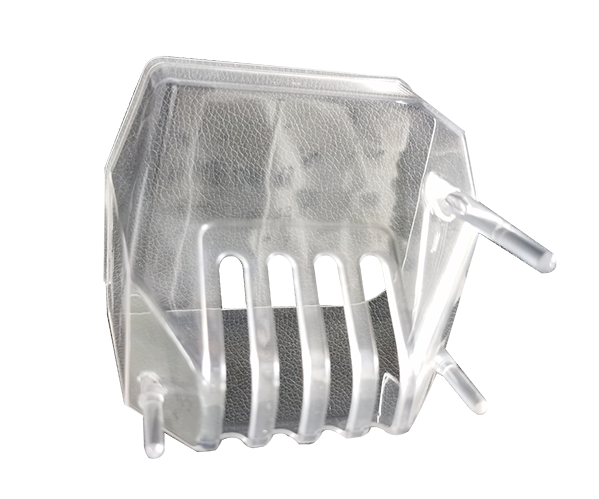
The Anatomy of the Mold
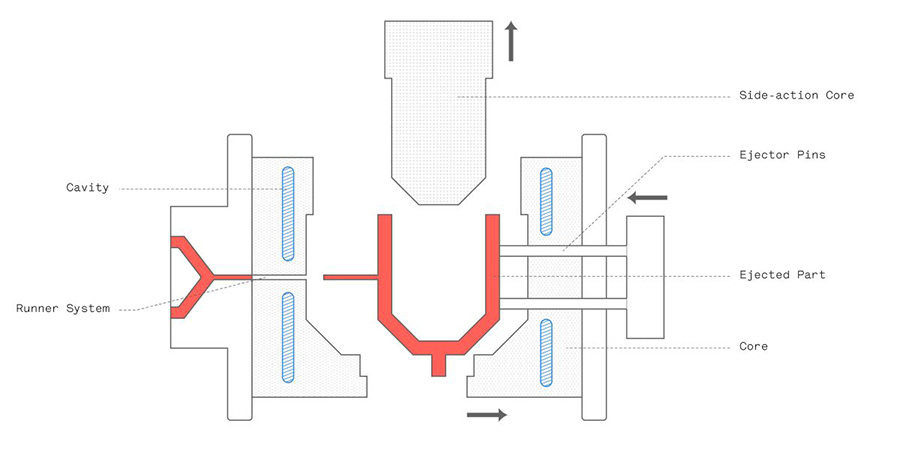
The core and the cavity have different functions. The core is the half of the mold that is closer to the injection system. It forms the cosmetic side of the part (A-side) that requires a good visual appearance. The cavity is the back half of the mold and it forms the "hidden" functional side (B-side) that includes all structural elements of the part (ribs, bosses etc).
The molds are usually CNC machined from aluminum (for 1,000 to 5,000 units) or tool steel (for 100,000+ units). For low-production runs (< 100 units) the molds can even be 3D printed to expedite lead times.
Apart from the "negative" of the part, a mold has other features that support the injection process. For example, molds often include cooling channels that accelerate the solidification process and vents that help evacuate the air from the empty mold.
Injection molding design guidelines
The table below summarizes the recommended and technically feasible values for the most common features encountered in injection molding.
| Feature | Recommended | Description | |
|---|---|---|---|
 |
Wall thickness | Thickness: 1 mm and 3 mm | To avoid warping and sinking, parts should be designed with the smallest possible and constant wall thickness. |
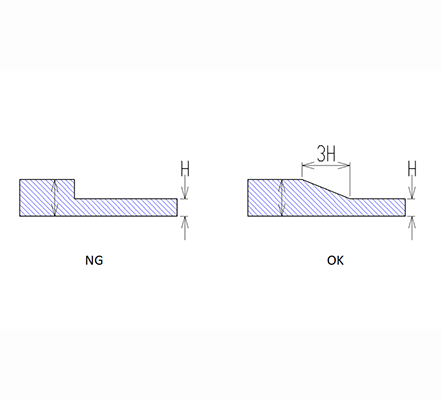 |
Smooth transitions | 3 × wall thickness difference | If wall thickness cannot be avoided, use a chamfer or fillet to make the transition as smooth as possible. |
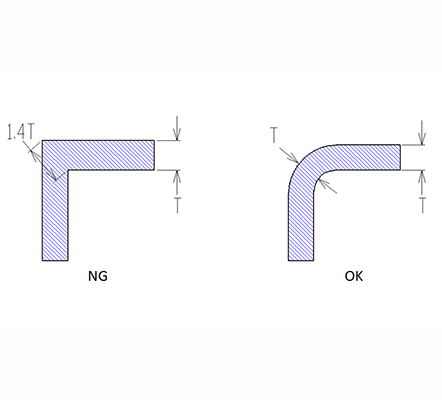 |
Rounded edges | Internal edges: > 0.5 × wall thickness External edges: internal fillet + wall thickness |
Add a fillet with a radius that is as large as possible to all internal and external edges. |
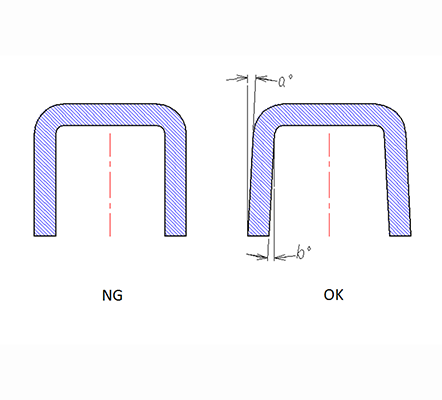 |
Draft angle | For parts taller than 50 mm: increase the draft by 1° for every 25 mm For parts with a textured finish: increase the draft by an extra 1°-2° |
Add a draft to all vertical walls to make the ejection of the part easier and avoid drag marks. |
